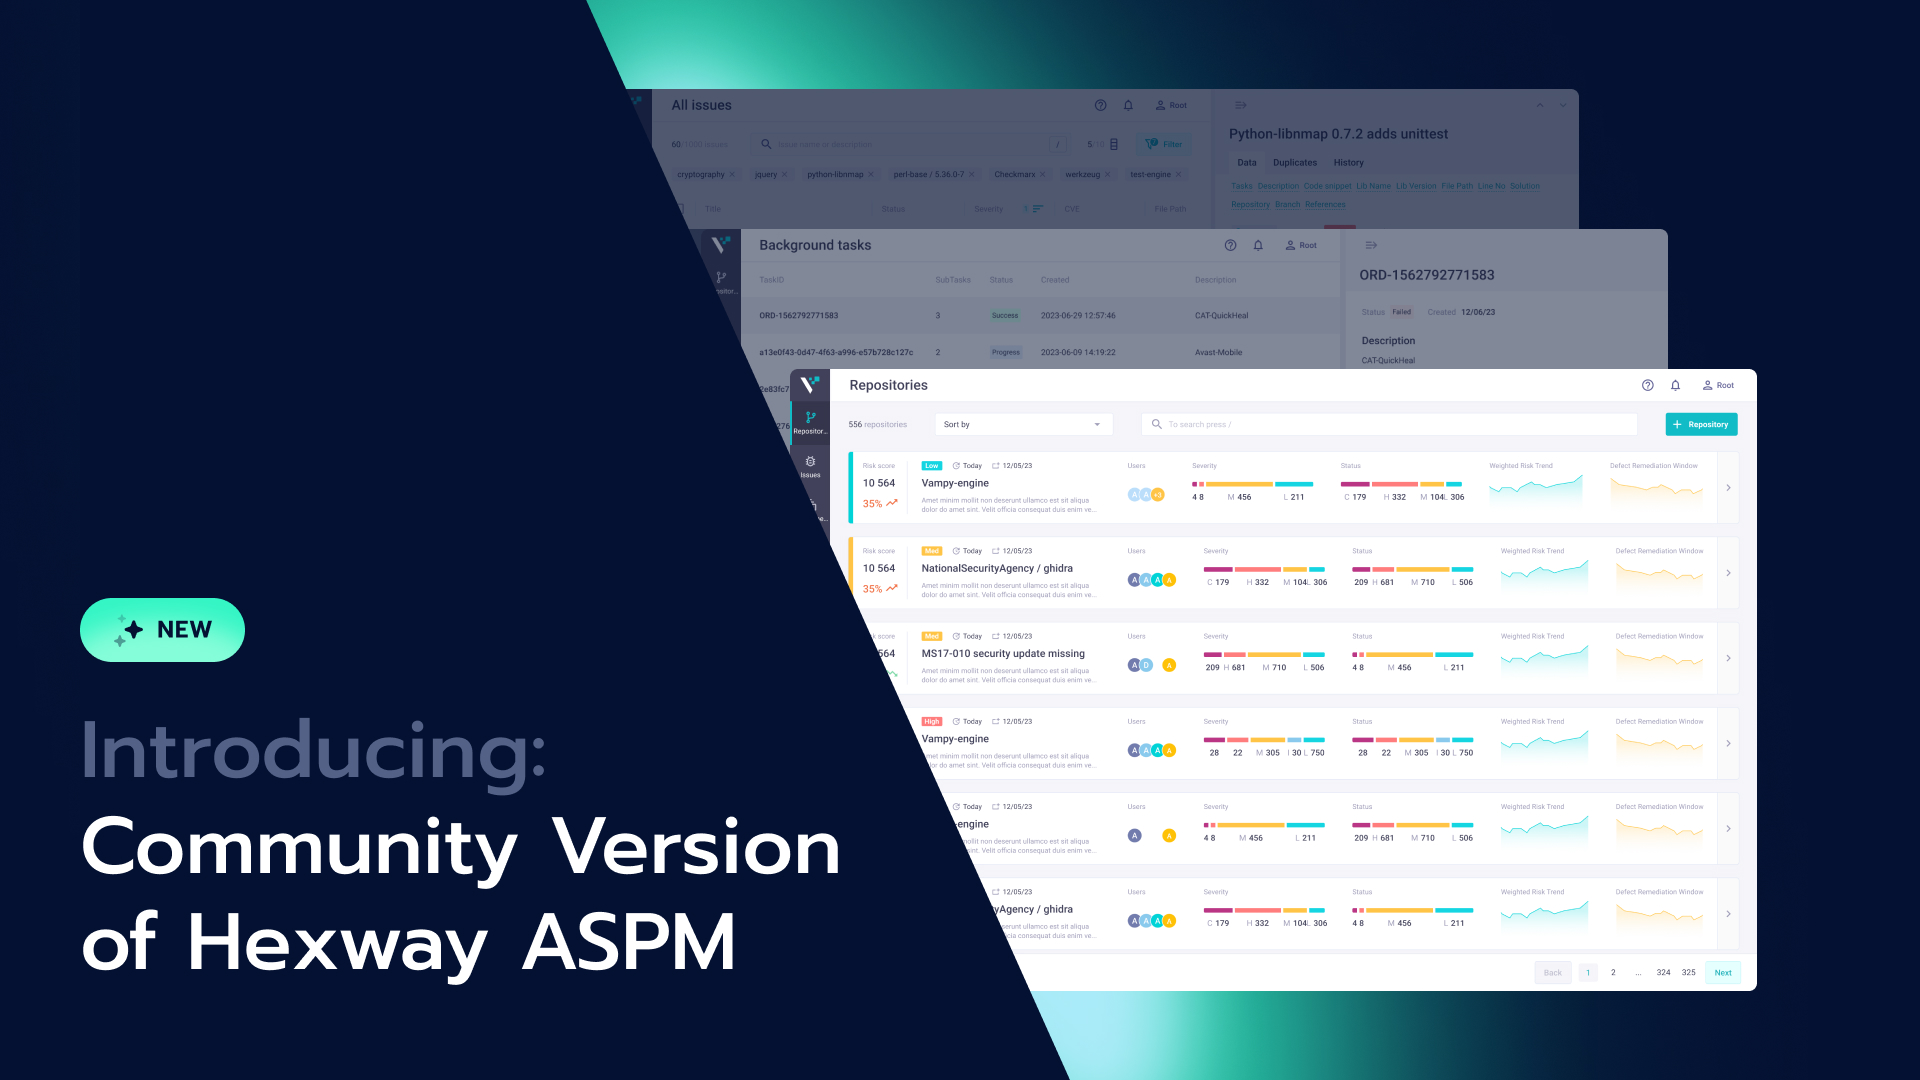
The first steps toward SSDLC. Integrating semgrep with GitLab-CI
We continue our DevSecOps series and decided to share simple steps toward implementing secure development into your current SDLC.
We recently discussed security as a necessary and key element in the modern software development cycle. So now it's time to try all this in practice because many have only read about it.
Disclaimer: This article fits those who just starting to implement DevSecOps practices and are looking for where to begin.
Nowadays, many different DevSecOps frameworks (Microsoft SDL, OWASPSAMM, OpenSAMM, BSIMM) describe completely different methods of building secure development processes. However, if we summarize, they all generally involve assessing the level of your SSDLC maturity and starting to apply various practices.
Most of these frameworks focus on architecture analysis, understanding metrics, building relationships within the company, and growing security champions.
All these things are useful and will benefit us in the long term. But today, we will be closer to real-life conditions and try to implement at least something. This may bring to life internal powers and arguments for the paper-organizational stages of these respected frameworks.
TL;DR
This article will show you how to connect your first SAST tool to your software pipeline.
What we will work with
So, for our experiments, we decided to pick:
- Gitlab, as a VCS and DevOps platform
- semgrep, as a great free static code analyzer
- DefectDojo and hexway VAMPY as an ASOC platform (Application Security Orchestration and Correlation platform — solution with all the information about found vulnerabilities, by the way, we also talked a little about this)
- vulpy, as a test repository, for which we will connect our SAST
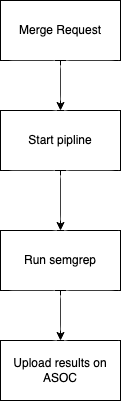
Our plan
- We make a Merge request with new code to our vulpy repository, and our pipelines start.
- We run semgrep as part of one of the security stages of the pipeline (in addition to building the application, running tests, and other DevOps magic)
- We export findings from semgrep to our ASOC platform to analyze them fastly and conveniently and add corrections if necessary (in most cases, it will definitely be).
- Profit!
Step 1. Add Security Stage
We have a vulpy repository, right?
Let's add a Security stage for its pipelines to make our work with the Security stage more convenient and scalable (in case we decide to add SCA scanners later).
We will also place all our operation logic into a separate .yml file, which we will then simply connect to our projects as needed.
Let’s now edit or create a .gitlab-ci.yml file for the repository where we want to add scanning and add a security stage to it.
stages:

  # - build stages
  - security

security:
  variables:
    SEC_ASOC_VAMPY: "true" # Use Hexway as an ASOC platform
    SEC_VAMPY_URL: "http://vampy.example.com/" # hexway ASOC URL
    SEC_VAMPY_KEY: "YOURKEY" # hexway ASOC API key

    SEC_ASOC_DDOJO: "true" # Use DefectDojo as an ASOC platform
    SEC_DDOJO_URL: "http://ddodjo.example.com/" # DefectDodjo URL
    SEC_DDOJO_KEY: "YOURKEY" # DefectDodjo API key
    SEC_DDOJO_ENGAGEMENT_ID: "DDOJO engagement id" # DefectDodjo Engagement ID

  stage: security
  trigger:
    include:
      - project: 'hexway/security-stage'
        ref: 'main'
        file: 'sec-stage.yml'
As you can see, this step refers to the sec-stage.yml file, which is located in the hexway/security-stage repository.
Where to get it? Here it is
Just clone it to your GitLab server (in case of self-hosted version). That’s it, yup.
And what's inside? Easy, let's just open sec-stage.yml:
stages:
  - code-scan       # sast scans job
  - reports-upload  # upload scanner reports

# allow_failure by default
.set_allow_failure:
  allow_failure: true

include:
    # Include SAST code scan stage
  - local: 'scan-types/code-scan.yml'
    ref: 'main'
    # Upload report stage
  - local: 'common/reports_upload.yml'
    ref: 'main'
Step 2. Add semgrep scan
As we remember, our stage consists of two steps:
- run semgrep
- upload results to ASOC
Let's look at our code-scan.yml:
semgrep:
  stage: code-scan
  variables:
    SEC_VAMPY_REPORT_FILE_NAME: 'semgrep.json'
    SEC_SEMGREP_CONFIG: 'p/owasp-top-ten'
  image: returntocorp/semgrep
  script:
    - echo "Running semgrep..."
    - echo "semgrep --config $SEC_SEMGREP_CONFIG --metrics=off --json ./> $SEC_VAMPY_REPORT_FILE_NAME"
    - semgrep --config $SEC_SEMGREP_CONFIG --metrics=off --json ./> $SEC_VAMPY_REPORT_FILE_NAME
  extends:
    - .set_allow_failure
  artifacts:
    name: "$CI_JOB_NAME_SLUG"
    paths:
    - $SEC_VAMPY_REPORT_FILE_NAME
    when: always
It is also pretty simple at this point.
We run semgrep to check for owasp-top-ten vulnerabilities, after that we save the scan results the semgrep.json file.
Basically, we could look at the scan results in the pipeline artifacts. But .json eye-browsing is super uncomfortable and unproductive. That’s what it looks like:

Geez. That's actually why ASOC systems were invented in the first place: to make work with the results of various scanners convenient and fast.
This is exactly what the last reports-upload stage does. By the way, in this article, we do not explain the process of installing and configuring the ASOC platform. This will be in our future articles, so stay tuned.
Let's just mention the fact that you need to define the following environment variables:
SEC_VAMPY_URL # hexway ASOC URL
SEC_VAMPY_KEY # hexway ASOC API key

SEC_DDOJO_URL # DefectDodjo URL
SEC_DDOJO_KEY # DefectDodjo API key
SEC_DDOJO_ENGAGEMENT_ID # DefectDodjo Engagement ID
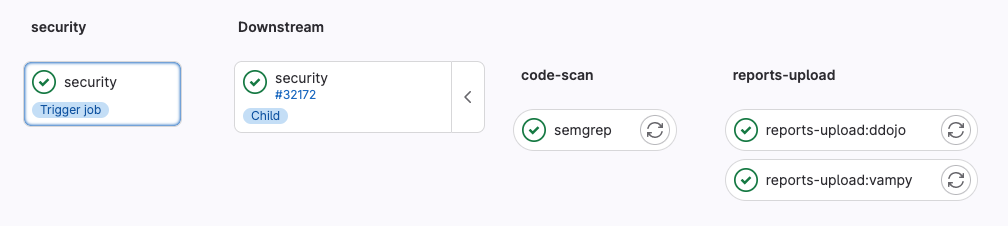
As a result, we get the following pipeline:
We are now ready to see our scan results visually attractive and convenient with the help of ASOC solutions.
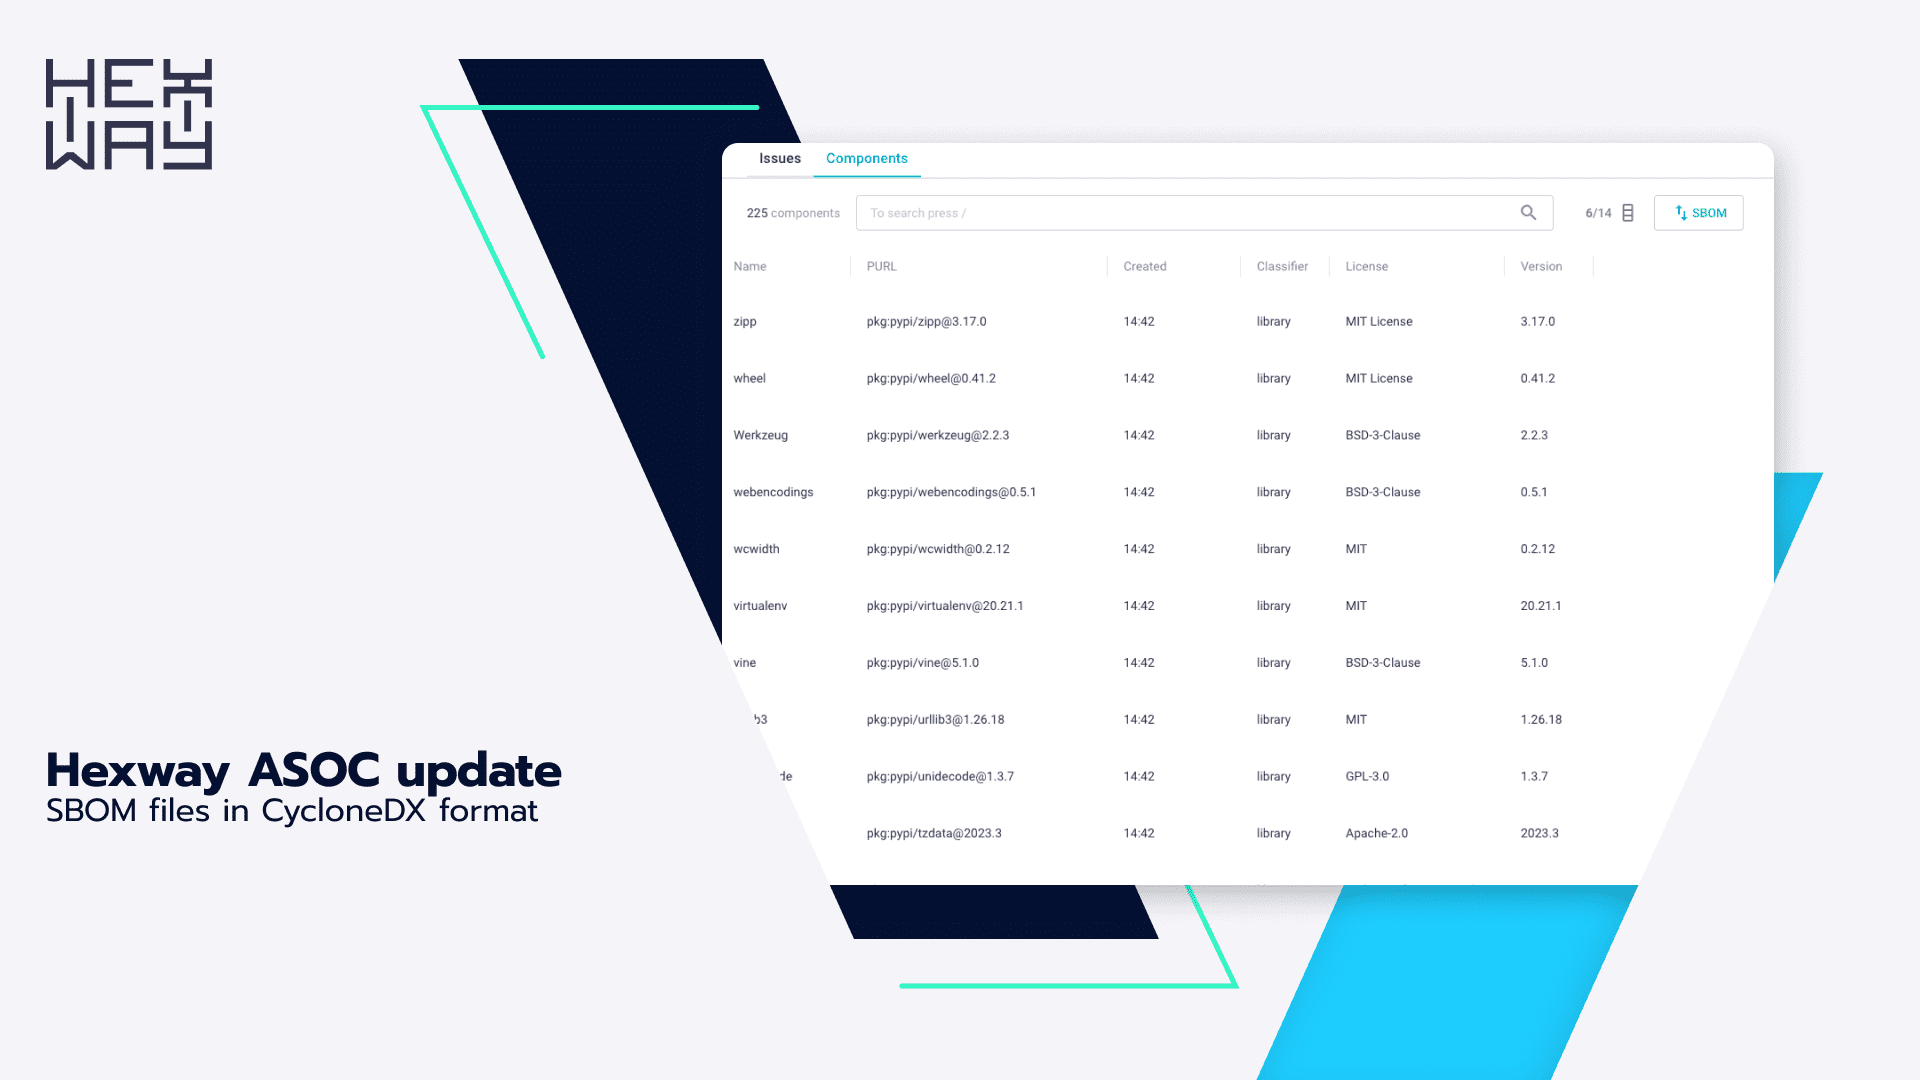
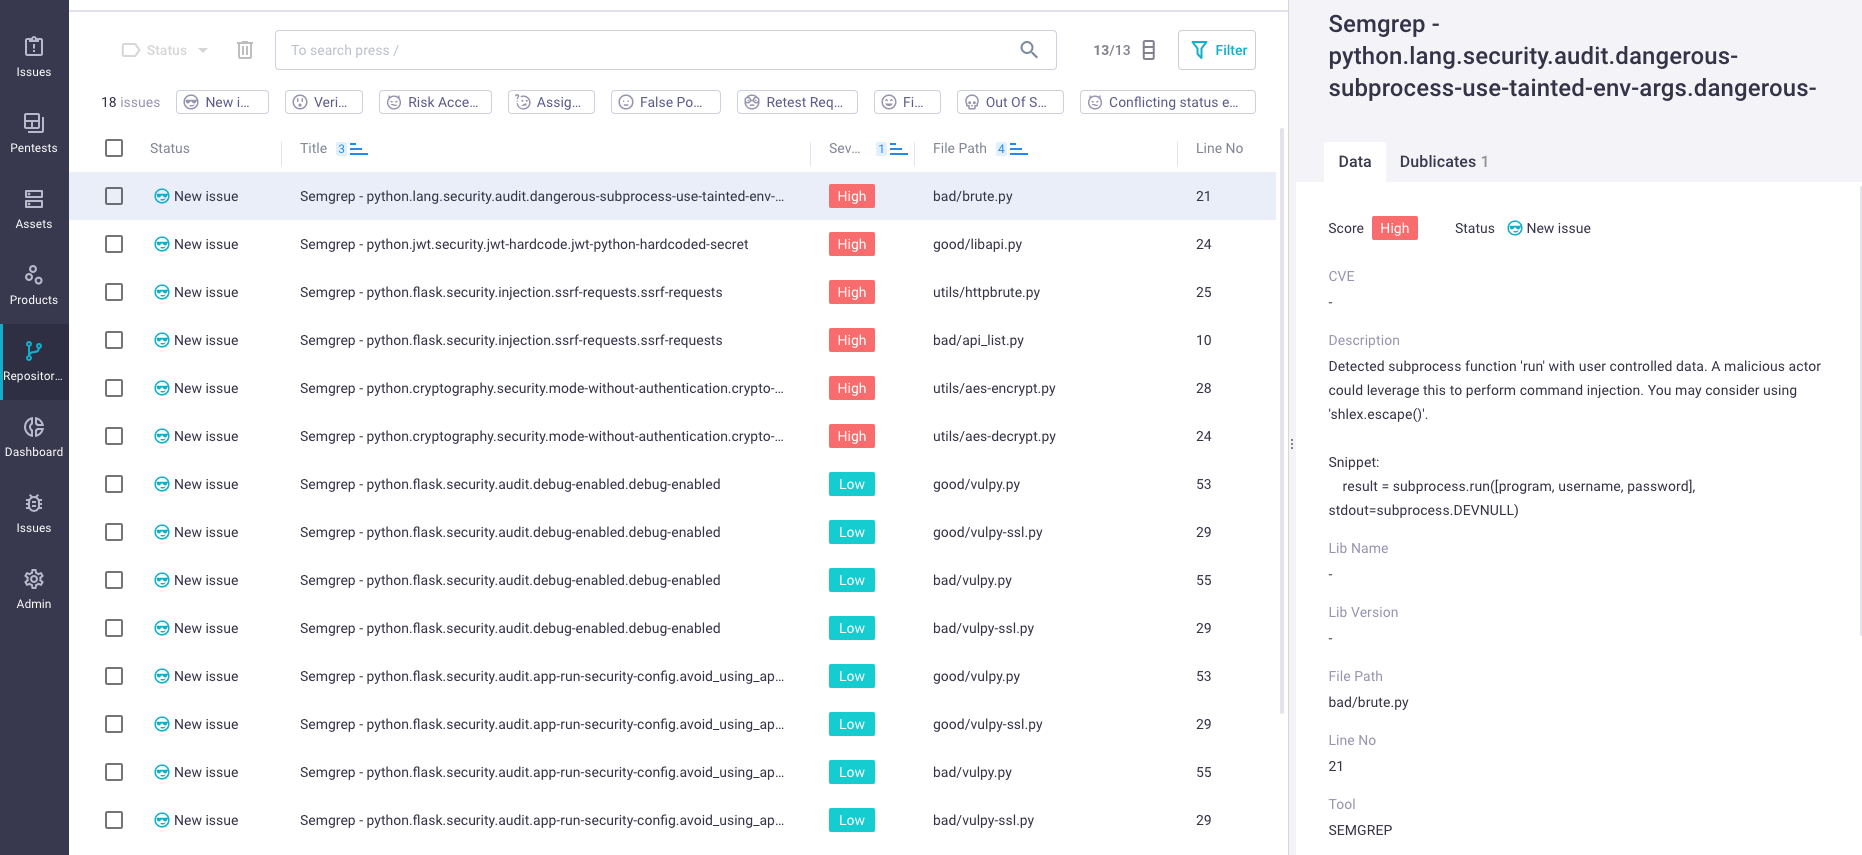
This is how vulnerabilities would look in hexway Vampy:
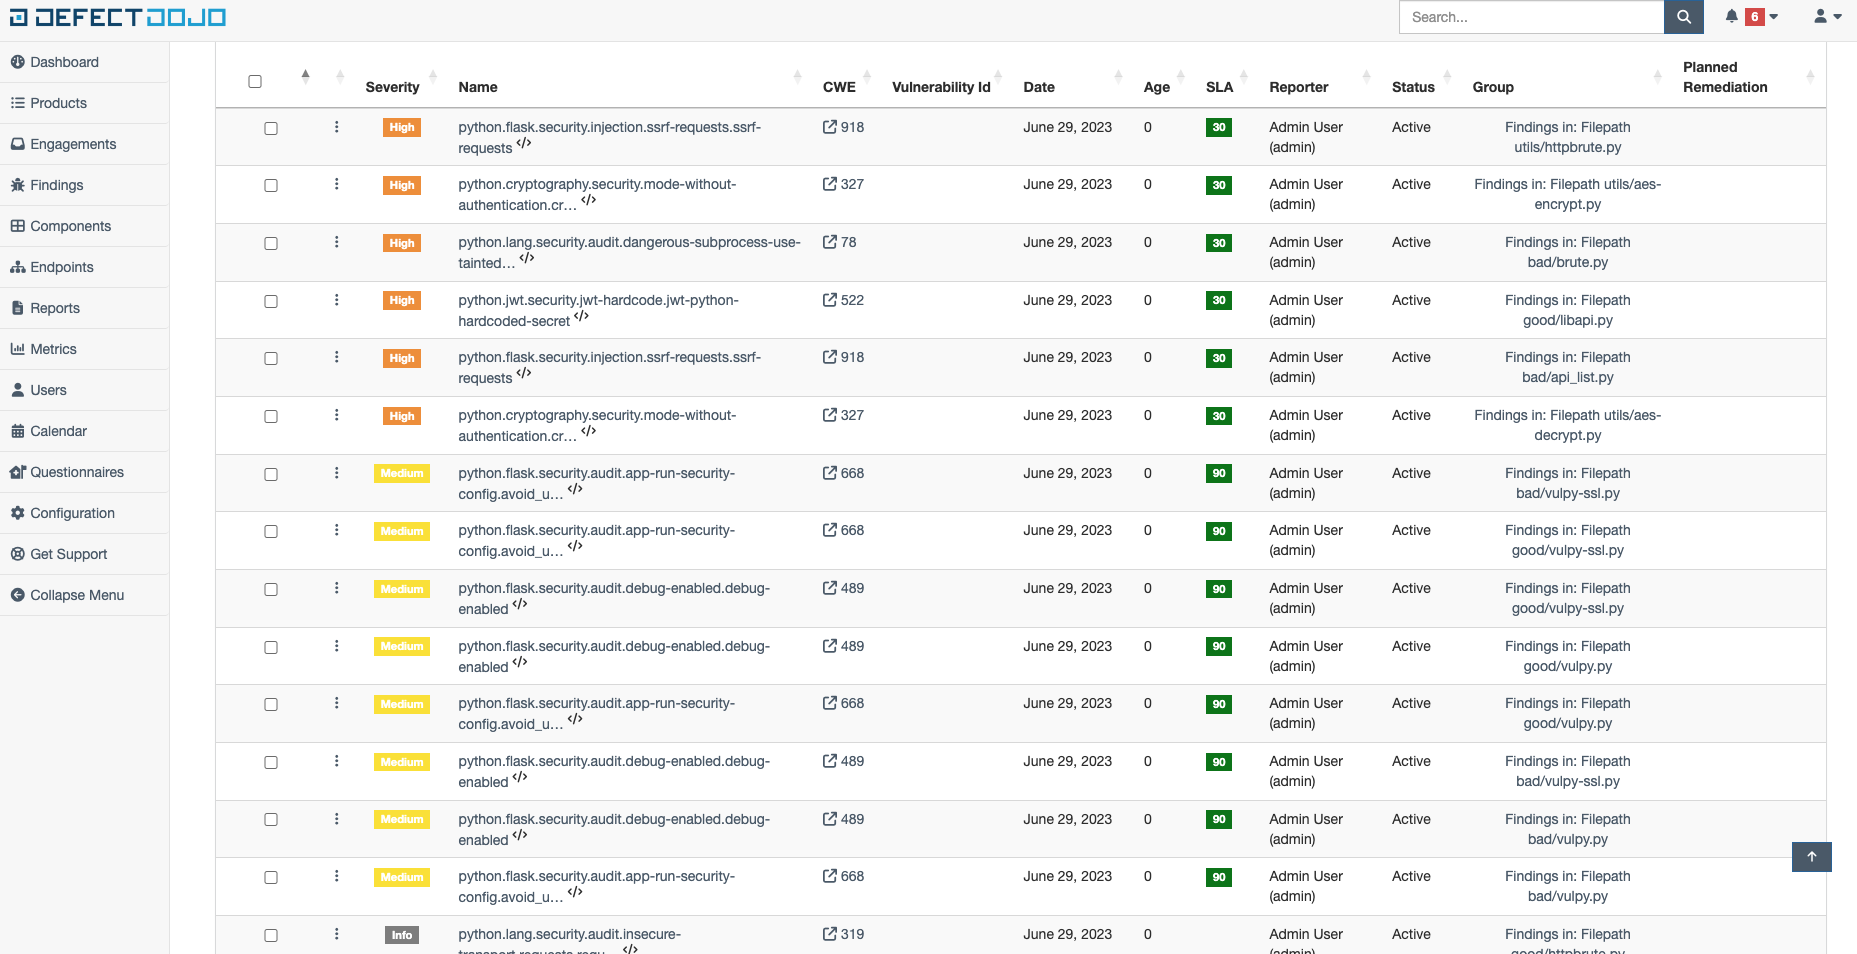
Let’s also see how the same list would look in DefecDojo open-source solution, which you might be familiar with:
Well, that's it for today. We’ve managed to connect semgrep SAST in our pipeline and also got to know solutions to work with aggregated data. Now you can start analyzing scan results, assigning tasks, and retesting.
If you are interested in the Hexway Vampy solution, we will be happy to give you a quick demo presentation and tell you how to integrate it into your SDLC painlessly.
Stay tuned because in the next articles, we will tell you how to:
- Install and configure ASOC
- Understand dependency scanning (SCA)
- Understand which metrics matter in this AppSec world of yours